Simple Hall Closet Makeover – Easy Weekend DIY
It’s been a few months since we moved into this 1930’s bungalow and it’s been quite the journey! While I’m enjoying getting settled in, I’m honestly struggling a bit with completing projects and finding function in this cozy older home. This tiny corner of the house is right next to the side entrance we use every day, so it was high time it became more functional. With backpacks and jackets piling up, I chose to take on the cramped closet in hopes of creating a more workable space. I wanted something that worked for me and the boys—simple, streamlined, and easy to maintain. I completed this hall closet makeover in just one weekend and it could not have been easier!
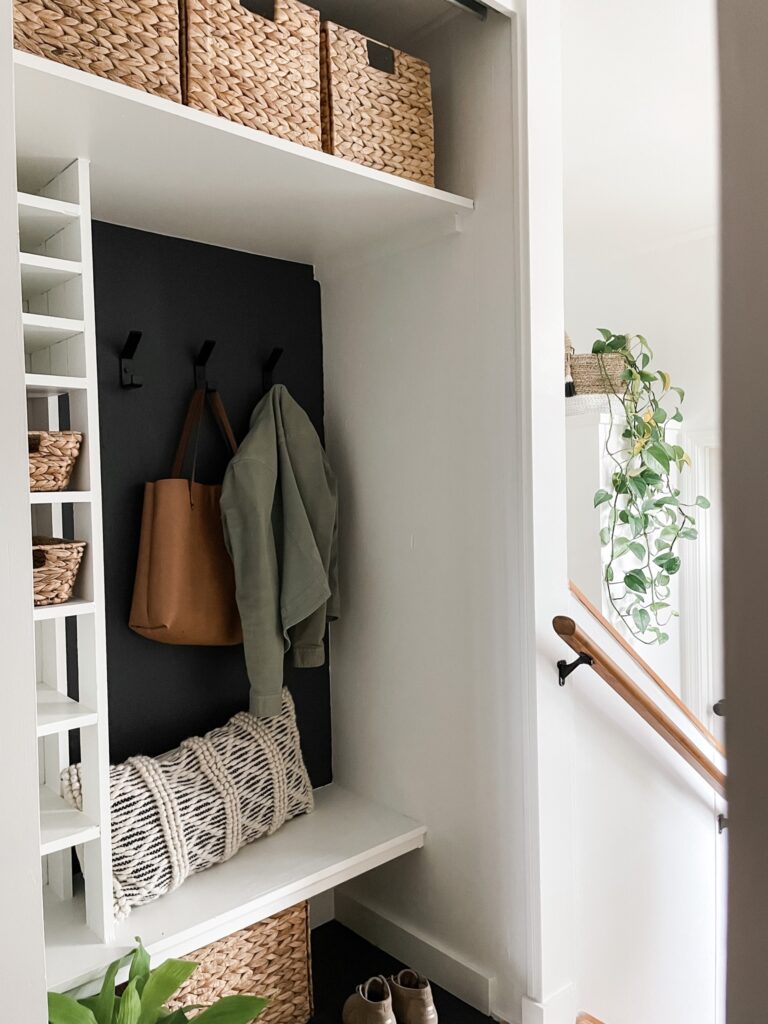
Let’s start with the finished project shall we? You can see how it all turned out and then I’ll go through what it looked like before along with all the steps I took. The finished closet makeover fits the overall vibe of our neutral house. It’s got contrast, black and white paint colors, metal hooks, and woven basket. Most importantly, I love how easy it is to use. It’s like a closet turned mudroom – a good mix of functional with some modern touches.
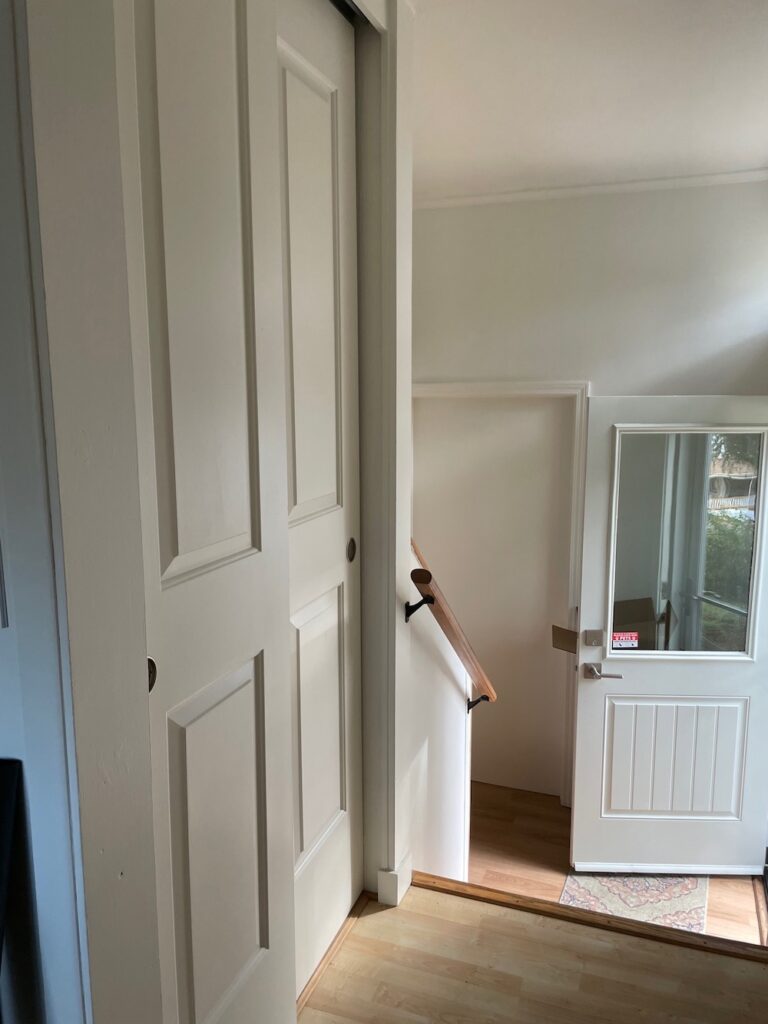
Ok, so now here’s a peek at the closet set up before. It’s not bad at the outset. In fact, you might even wonder why I tackled this space. Well, let me explain. First, it’s right next to our side door which actually gets a lot of use. There’s a bank of stairs and it’s a tight squeeze into the kitchen.
So, like many entryways, this quickly became a log jam. On a daily basis we were cramming backpacks, into the closet, stepping over shoes spilling out, and trying to navigate in and out of the house within this narrow space. I was really looking to make it more organized and user friendly.

The sliding doors made technical sense for a small space (don’t need to deal with doors hinging outward), but were dreadful for actually trying to put stuff away. And while I love really juicy projects like last month’s fireplace makeover, I firmly believe in solving functional issues first to make a home feel comfortable. Who cares if it looks pretty if you can’t operate on a daily basis!
Hall Closet Makeover Steps
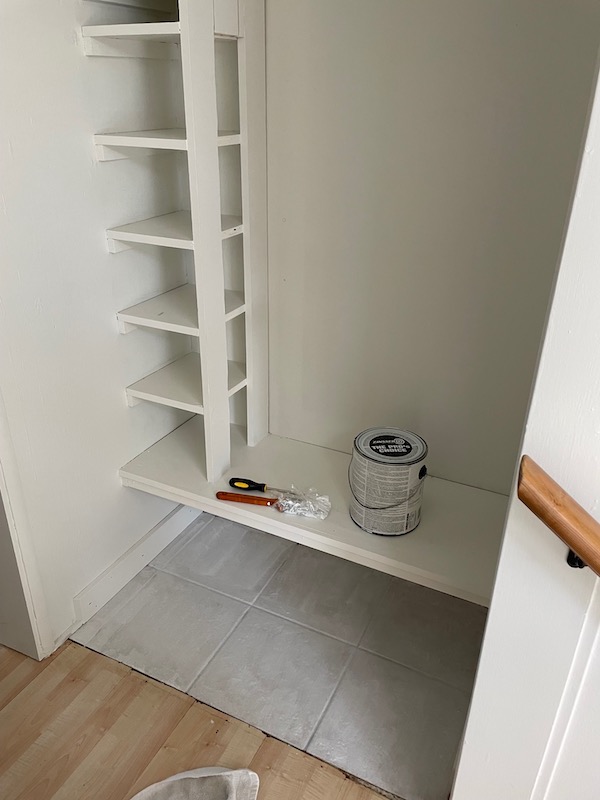
Because this is an older home, we have a few basic built ins. If built ins are not an option, I found some easy DIY alternatives including these tall wood shelves and a wood shoe bench. Beyond that here are the steps I took:
Remove Closet Sliding Doors
This was way easier than I thought, I unscrewed the metal hardware and detached the doors! Just this one step opened up the entire area. I also removed the track hardware, saving both in case I needed for later.
Take Down Closet Rod
This step gave me a blank slate to work with. It was quick, and the space felt instantly lighter. By removing the rod, we no longer needed hangers (which were always falling and flying off) and instead rely on sturdy double hooks.
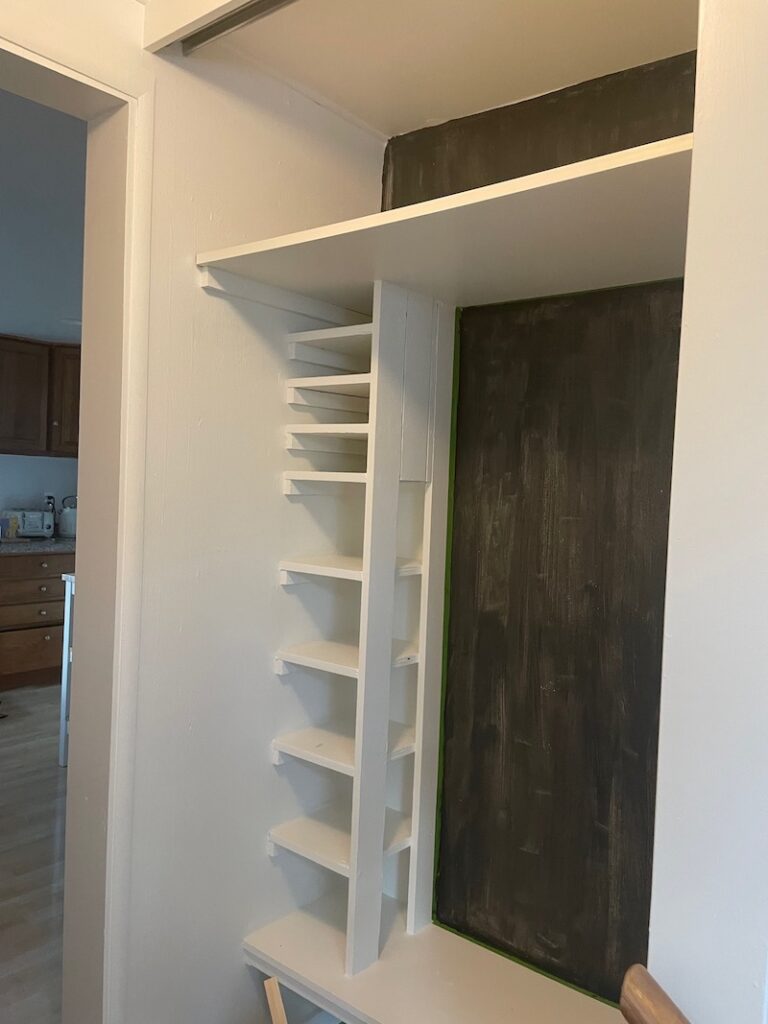
Prep: Patch Holes & Caulk
Before painting, I always check for necessary holes to patch and use my favorite All in One Hole Filler (seriously, it’s genius!). It’s super easy to use and makes this step a breeze.
Next, I caulked some of the seams in the wood work. If you’re working with any sort of built in or trim work, this will create more of a custom look and so necessary for older homes like this one that needs a bit of refinement. This is the caulk I use for these type of projects,
Clean & Prime Tile Floor
Now, this is just a small amount of tile that won’t really get walked on so I decided to paint it with regular paint. Because of this, I cleaned and primed it first. Someday, I’ll replace all the flooring. If you’re not changing the flooring, just skip this step!

Paint Closet Back Wall
Using leftover Iron Ore paint in a Matte finish I painted the back wall, top shelf, and floor to give it more depth. This color added dimensions and made the space feel more intentional. It also ties in nicely with the other moody tones throughout our home. It’s not a crucial step but dang if it’s doesn’t make the space feel a lot more custom.
Install Wall Hooks on Closet Cubby
Next, I installed black metal hooks, —one for each of us. They’re modern, sturdy, and bonus: they’re made by my brother’s business (where I also work!). This instantly made the space more usable for backpacks and coats. I simply used painter’s tape to mark off the best height to make it hanging things easy and then spaced out each hook evenly. Drill and attach!

Baskets for Closet Organization
To finish it off, I added a row of woven baskets on the top shelf. One for each of us. They hold the not-so-everyday things like gloves, scarves, and small gear. Simple, but so effective. I’ll probably label them down the road with each of our names just to finish the closet makeover.
To make the best use of those cute little built in shelves, I measured and found baskets just the right size. This makes great use of this feature. While not every closet has this bonus, measuring and choosing items that fit well definitely increase the function!
Final Thoughts on Closet Makeover
And that’s it! I am so happy with how this closet makeover turned mudroom looks now. Even though it was a quick and easy one, it feels so good to cross something off this list and make our home more functional! I completed this makeover as part of my entire decluttering process – learn How To Organize Your Home in 5 Easy Steps.
Looking for more simple & affordable projects? Check out 9 Easy Home Updates Under $200 – I’ve completed most of these myself!


