Painted Brick Fireplace Before and After
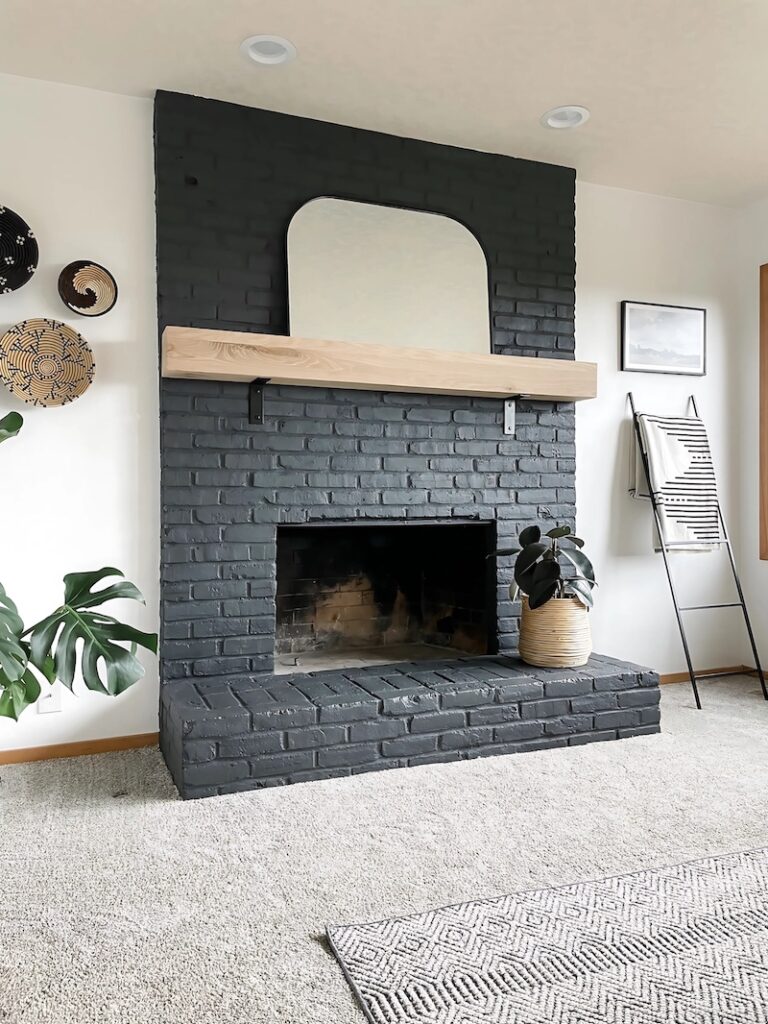
This project has been a long time coming! When I first purchased this home a little over a year ago, I knew I wanted to give this red brick hearth a proper makeover. I love some good masonry but this brick was just too maroon for me and honestly wasn’t the best quality. After painting the entire room a nice neutral white, I brainstormed a few ideas. Concrete maybe? White like the walls? Nope, I stuck with my style and went high contrast with black plus a natural wood mantel. I let me say I could not be happier. I actually looked up the next morning while making coffee in the kitchen, and said out loud (to myself), “damn, that looks good.” This painted brick fireplace goes down in the history books as one of my favorite makeovers to date so I’m sharing the details here.

First, let me say, I take painting over brick or stone really seriously. There’s no going back. If this had been more of a neutral brick I likely would’ve kept it or maybe tried another white wash glow up. However, this color of brick is super dated and just made the whole room feel dark. Even though the entire process took waayy longer than I anticipated, I have absolutely no regrets. The dark color and wood mantel are everything I dreamed of. I’ll lay out my steps here along with some common questions.

Painted Brick Materials & Sources
- Rags, Scrub Brush, & General Cleaner: to prep the brick
- Primer: Sherwin Williams Loxon Concrete & Masonry Primer
- Paint: Sherwin Williams Iron Ore (Matte Finish)
- Paintbrush & Roller: High-quality roller, brushes, and chalk paint brushes for grout
- White Oak Mantel: Urbandi
- Heavy Duty Brackets: Cascade Iron Co.
- Level & Drill: For mantel installation
- Masonry Bit & Masonry Bolts: For drilling into brick
- Drop Cloths & Painter’s Tape: To protect surrounding areas
- BONUS- Recessed Lights: Replaced old “eyeball” lights above
Painted Brick Fireplace Steps
There were a lot of separate steps from start to finish. Because I don’t have big chunks of free time, I spread it out over a few weekends which took longer but also made it feel much more manageable. I think if I tried to tackle it all it once I might’ve lost my mind.
1. How to Paint & Prep Brick Fireplace
Admittedly, this is my least favorite step. I always have to pump myself up for this part. It’s like, let’s just get to the fun part, you know? But, I’ve learned the hard way that painting always goes smoother once you get all the prep done. Just like when I whitewashed a brick fireplace, I took some time to really get this one clean.
You might be wondering, how exactly do you clean a brick fireplace? Well, I used a mixture of equal parts of vinegar and water. With a soaked rag I washed from top to bottom just sort of brushing over it. For some really dirty parts, I used a scrub brush. If the brick was super filthy, I’d bump it up to a more hardcore cleaner like TSP cleaner.
Once it was all clean, which honestly looked so much better just doing that, I let it dry for a few days. I’m not sure how long brick needs to really dry but since it’s so porous I gave it a good while to air dry.
2. Primer Before Painting Brick
Priming the brick was not necessarily my original plan. I had hoped to use a paint and primer in one. However, I had nice long chat with the kind worker at Sherwin Williams and he said that was one option but he’d likely recommend a stronger separate primer. Even though I wasn’t thrilled with the extra step, I decided priming the brick before painting was worth it.
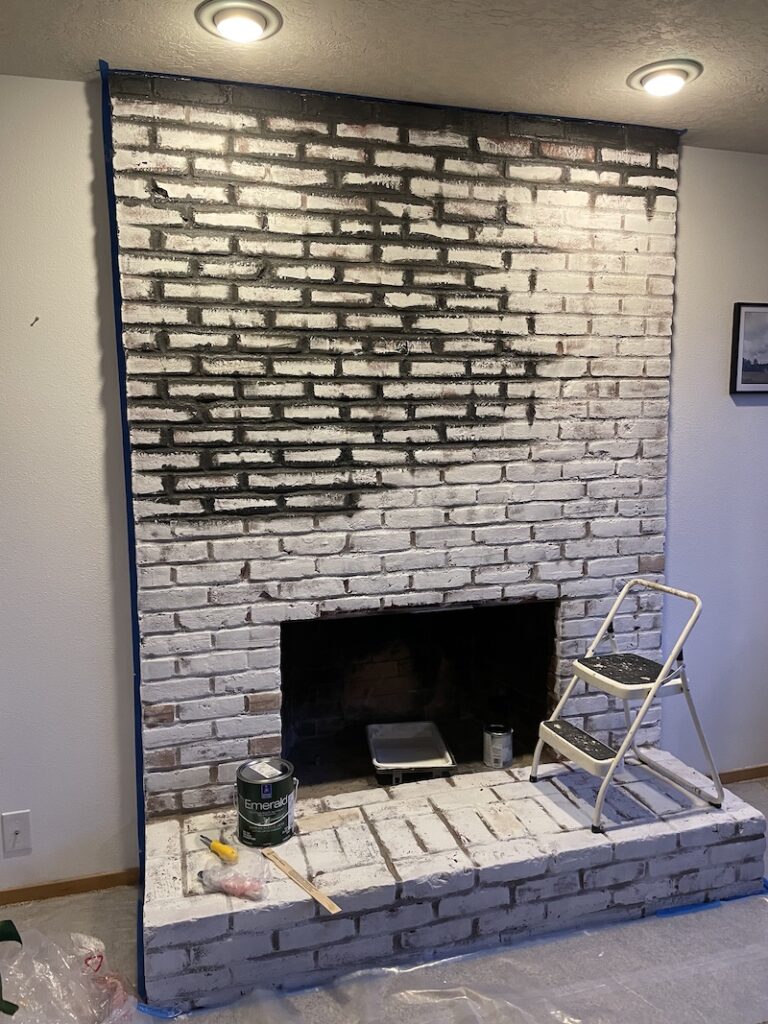
So, I using a big brush and roller, I gave the fireplace a nice coat of primer. I struggled getting the grout completely covered and sort of dabbed at it with the brush to try and maximize coverage. This step took approximately three podcasts and I my patience wore a bit thin. Ultimately, it was completely primed and ready for the black paint magic.

3. Painting Brick Fireplace
And this is where the story gets good. Ah, yes, bring on that dark black paint that makes everything look good. When it comes to painting fireplaces black, this is not my first rodeo. I painted the tile fireplace and surround as well as a stone gas hearth in other houses. While I often go for a true deep color like Tricorn Black, I wanted to go a little softer here and used Sherwin Williams Iron Ore – my other black paint soul mate. It’s more of a very dark charcoal but it’s definitely part of the club. Check out my Tricorn Black and Iron Ore Comparison for more details.
What Type of Paint is Needed for Painted Brick?
Remember the helpful paint store guy? Well, even though I was very much committed to using regular paint like I usually do, I thought I’d just double check if brick fireplaces need special paint, and nope, you can use regular acrylic latex paint. Unless the fireplace is expected to get extremely hot like wood fires raging daily (a pizza shop maybe?), the regular paint is fine. There is a high heat paint they offer just in case, I’ve used that before beneath my wood stove.
For this project I used the Sherwin Williams Emerald line in a Matte finish. I actually always choose this one, their satin finish is way too shiny for me. The sheen goes from 0 to 60. I love a good matte look and the new formulas make them easier to clean.
Just like with the priming step, I started by brushing the grout and then using a roller for the actual bricks. I ordered special chalk paint brushes to really get into the grooves. This definitely was time consuming but these bricks were pretty craggy and chipped – I think smoother, newer brick would be much easier. Ultimately, I painted two coats plus lots of touch ups.

Adding an Oak Wood Mantel
Now for the grand finale – the oak wood mantel! The painted brick fireplace looked great by itself in black, I liked the bold backdrop. However, I thought a natural wood mantel would really add warmth to this space. Not to mention functionality – for the last two holidays we hung our stockings on the staircase (not a bad Plan B). I was so happy to find this beautiful wood mantel from Urbandi – it was easy to find the right size and wood finish that fits my style (organic modern).
I ordered the 72″ length because I wanted it to span the full width of the fireplace hearth. I really like that look though I know many folks like a shorter mantel. My mantel is 6″ width x 6″ height in Unfinished White Oak. I chose this size as it would be easy to install and also seemed proportionate to my fireplace and 8′ ceilings. If my fireplace was larger, I’d probably go with a bigger mantel.

How to Install a Mantel on Brick
Now, you might be wondering can you drill into a brick fireplace? Yes! You just need a masonry drill bit – easy to find. It’s surprisingly simple and goes in really easily. The next important part is using the correct hardware for brick. I used masonry bolts thought Urbandi generously supplied their own hardware for a true floating mantel effect.
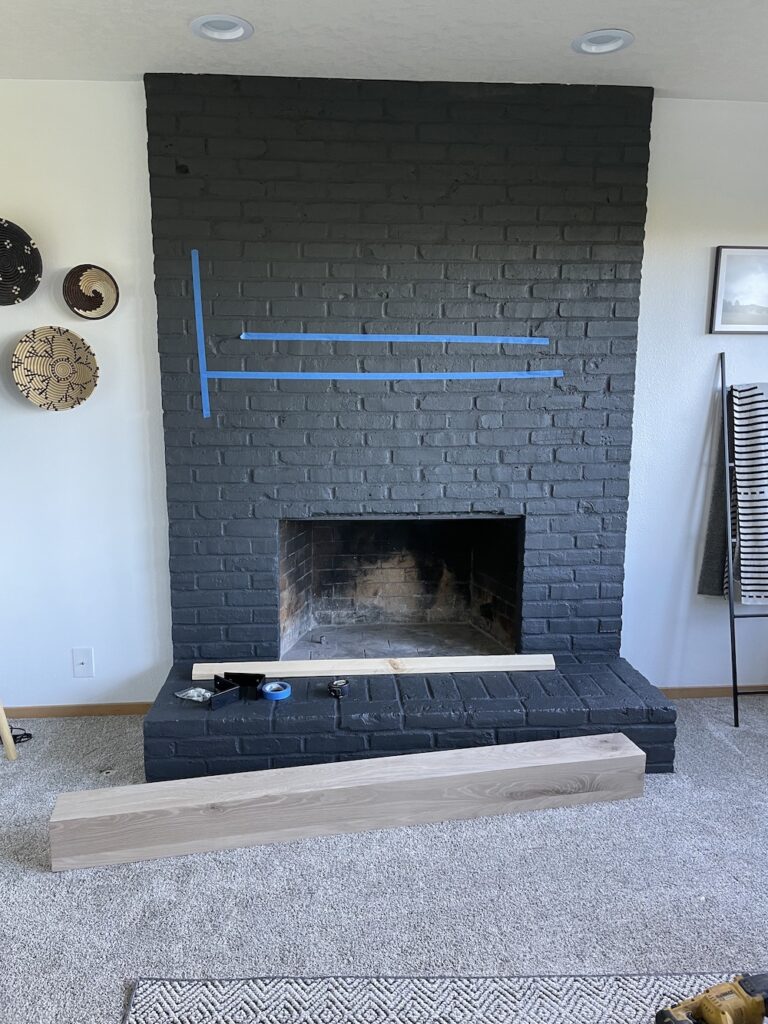
Because I wanted the look of hardware as an extra design detail and long last supporting, I used Heavy Duty L Brackets from Cascade Iron Co. and installed the mantel just like a shelf. Well, when I say I, I really mean my brother helped me. I’m so thankful to have him! We used painter’s tape to mark off the level lines and marked the mantel 54″ up from the floor.
The mantel has a hollow core so although it’s really hefty and solid feeling, it’s still fairly easy to lift with two people. Overall, the install was a cinch and took less than 20 minutes. I am in love with the natural wood finish against the black painted brick. It’s a texture lover’s dream!

Paint Brick Fireplace FAQ
There are a lot of options out there but in my experience, a neutral black paint color is best for a fireplace. Iron Ore and Tricorn Black from Sherwin Williams are both good options. Iron Ore is every so slightly warm and more of a dark charcoal while Tricorn is a true, rich, deep black color.
Yes, you can paint over previously painted brick as long as the surface is in good condition. Clean the area to remove any dust, soot, or peeling paint. If the old paint is glossy, lightly sand it to help the new coat adhere. Use a high-quality primer before applying fresh paint.
Oh no! Peeling paint on a brick fireplace usually means the surface wasn’t properly cleaned or primed before painting. Brick is porous and can hold moisture, so if it wasn’t fully dry the finish may not adhere. To fix it, scrape off loose paint (be careful if it’s old paint), allow the brick to dry completely, apply a masonry primer, and repaint.
Final Thoughts on Painted Brick Fireplace
I will scream this from the rooftops – this is one of my favorite makeovers to date! It instantly brought this 80’s loving house right up to modern times without feeling overdone (at least that’s my humble opinion). The black painted brick fireplace plus the natural oak mantel proudly display my organic modern vibes and now stand tall as a true showstopper. The before and after is a thing of beauty!
I styled the mantel with a simple Arched Mirror and White Ceramic Vase – both a contrast in shape in color to the rest of the fireplace. This is one of many hearth updates so check out my other fireplace makeovers ideas for pictures and inspiration.


